
How to Choose the Best Hot Swappable Switches?
Choosing the best Hot Swappable Switches is less about chasing popular names. It is about matching a switch to your hands, keyboard, and daily habits. A soft linear switch may feel smooth during long writing sessions. A crisp tactile switch may provide clearer feedback for gaming or coding.
Thomas Baart, a respected mechanical-keyboard designer and reviewer, says, “The right switch should support your typing, not distract from it.” That principle matters when comparing actuation force, travel distance, spring weight, and sound profile. It also encourages practical testing. Install a few switches in the same keyboard, then compare them beside your desk. Listen for a sharp click, a muted thock, or unwanted spring noise. Feel whether the key returns quickly.
Compatibility deserves equal attention. Check whether your PCB accepts three-pin or five-pin switches. Confirm the socket type before buying a large pack. Examine the pins carefully. Bent metal can damage hot-swap sockets.
Factory lubrication can reduce scratchiness, but consistency varies. Some switches feel excellent immediately. Others need adjustment. My first switch choice focused too heavily on sound, and that was a mistake. Finger fatigue appeared after several hours. Sound alone is not enough.
Reliable selection combines manufacturer specifications, independent reviews, and personal testing. Consider durability, wobble, housing quality, and replacement availability. The “best” option may not feel impressive in a short demonstration. It should remain comfortable after thousands of keystrokes. That quieter judgment often leads to a better keyboard.
What Hot-Swappable Switches Are and How They Work
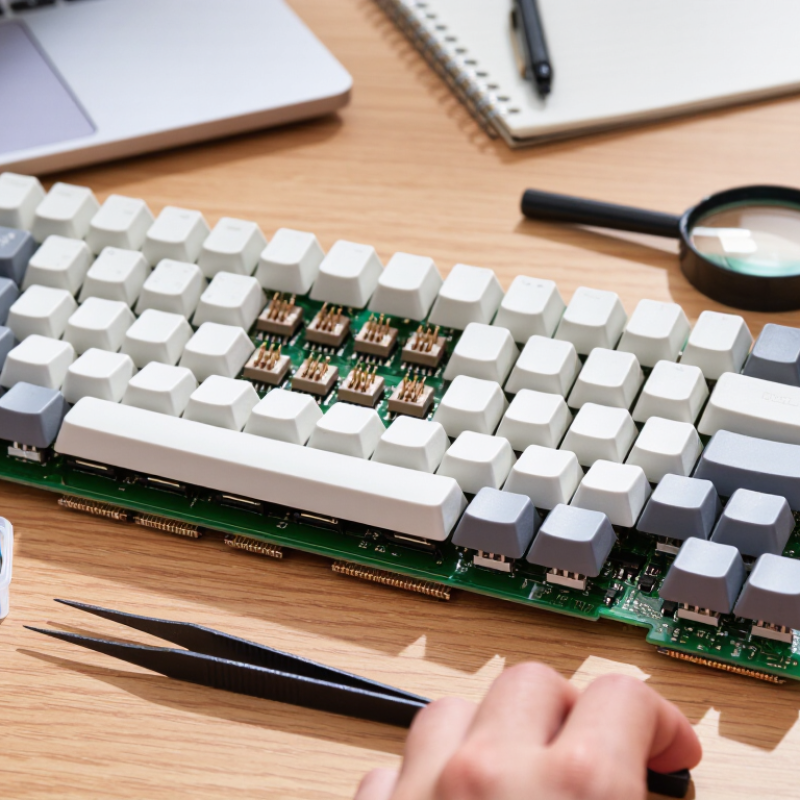
Hot-swappable switches are mechanical switches designed for replacement without soldering. Each switch has a stem, spring, housing, and two electrical contacts. Pressing the stem compresses the spring and closes the contacts, sending a key signal through the PCB. A hot-swap socket grips the switch pins beneath the board.
They are not solder-free magic. The PCB must support the correct socket layout, pin spacing, and switch type. Standard mechanical switches usually use three or five pins, while optical and magnetic designs often require different electronics. A plate also matters. It keeps switches aligned and reduces sideways movement during typing. Check these details before buying.
Market data explains why compatibility matters. IDC recorded about 245.3 million personal computers shipped worldwide in 2024, supporting continued demand for replaceable input hardware. Grand View Research estimates the global computer keyboard market will grow steadily through 2030, with customization as a significant user preference. Those figures show market momentum, not guaranteed switch quality. In practical testing, a lighter spring can feel quick but may cause accidental presses. A heavier spring can improve control, yet fatigue may appear during long writing sessions. Rated lifespans are cycle estimates, not promises. Listen for socket wobble, inspect bent pins, and test every key before final assembly. Some choices still require compromise.
How to Choose the Best Hot-Swappable Switches? - What Hot-Swappable Switches Are and How They Work
| Switch Type or Feature | How It Works | Typical Actuation Force | Typical Total Travel | Sound Profile | Main Advantages | Best Use Cases | Points to Check Before Buying |
|---|---|---|---|---|---|---|---|
| Hot-Swappable Socket | Allows switches to be installed or removed without soldering. The switch pins press into electrical contacts mounted on the keyboard PCB. | Not applicable | Not applicable | Depends on the selected switch, plate, keycaps, and keyboard case. | Fast switch replacement, easy maintenance, and simple experimentation. | Custom keyboards, shared workstations, beginners, and users who frequently change switch types. | Confirm the socket standard and whether the PCB supports the required switch pin layout. |
| Linear Switch | The stem moves smoothly from top to bottom without a tactile bump or intentional click. | Approximately 35–80 gf | Usually 3.5–4.0 mm | Generally quieter and smoother than clicky switches, although bottom-out noise can still be noticeable. | Smooth keystrokes, consistent movement, and low interruption during rapid key presses. | Gaming, fast typing, and users who prefer a clean, uninterrupted key feel. | Choose the force carefully; very light switches may cause accidental presses, while heavy switches may increase fatigue. |
| Tactile Switch | Uses a bump in the stem or internal mechanism to provide physical feedback near the actuation point. | Approximately 45–75 gf | Usually 3.5–4.0 mm | Moderate sound; usually quieter than clicky switches but louder than many linear switches. | Clear feedback without requiring a separate click mechanism. | General typing, office work where moderate sound is acceptable, and users who want confirmation of each press. | Some tactile designs have a sharp bump, while others feel rounded; samples are useful when possible. |
| Clicky Switch | Combines tactile feedback with a deliberate click mechanism that produces an audible sound during actuation or release. | Approximately 45–75 gf | Usually 3.5–4.0 mm | Clearly audible and typically the loudest switch category. | Strong tactile and audible confirmation with a distinctive mechanical typing experience. | Private rooms, enthusiast typing, and users who enjoy pronounced feedback. | Consider nearby coworkers, microphones, shared rooms, and noise restrictions before choosing this type. |
| 3-Pin Switch | Uses two metal electrical pins and one central plastic guide post for alignment. | Depends on the switch design | Depends on the switch design | Depends on the switch design and keyboard construction. | Broad compatibility with many 3-pin PCBs and simple mechanical construction. | Keyboards with PCB-mounted switch support designed specifically for three-pin switches. | Check whether the keyboard plate or PCB requires additional alignment legs. Do not force incompatible pins into the socket. |
| 5-Pin Switch | Uses two metal electrical pins plus three plastic alignment posts for improved positioning and stability. | Depends on the switch design | Depends on the switch design | Depends on the switch design and keyboard construction. | Better alignment and reduced wobble on PCBs designed for five-pin switches. | Custom mechanical keyboards and builds that support five-pin PCB-mounted switches. | Some 5-pin switches can be modified for certain 3-pin PCBs, but modification may void returns and can damage pins if done improperly. |
| Actuation Force | The approximate force needed for the switch to register a key press. It is commonly stated in gram-force, abbreviated as gf. | Light: about 35–45 gf Medium: about 45–60 gf Heavy: about 60–80 gf | Not applicable | Does not directly determine sound, although heavier presses may produce stronger bottom-out noise. | Helps match the keyboard to typing speed, finger strength, and fatigue preferences. | Light force for rapid or low-effort typing; medium force for balanced use; heavy force for users who prefer resistance. | Manufacturer force curves may differ. Initial force, operating force, bottom-out force, and spring weight are not always identical. |
| Pre-Travel | The distance the stem moves before the switch electrically registers the key press. | Often about 1.0–2.2 mm | Part of the total travel | Does not determine sound by itself. | Shorter pre-travel can feel faster, while longer pre-travel may provide a more traditional typing feel. | Gaming and rapid input may benefit from shorter pre-travel; general typing often suits a balanced value. | Short pre-travel does not automatically make a switch better or faster for every user. |
| Total Travel | The full distance from the key's resting position to the bottom of the switch housing. | Not applicable | Usually 3.5–4.0 mm for full-travel mechanical switches | Longer travel can create more bottom-out sound if the key is pressed fully. | Influences the depth and pacing of the keystroke. | Full-travel switches suit traditional typing; reduced-travel designs suit users who prefer shorter movement. | Verify the switch type, because low-profile switches generally require compatible low-profile keycaps and sockets. |
| Lubrication | Lubricant is applied to selected internal contact points to reduce friction, spring noise, and housing noise. | Does not change the rated force consistently | Does not change the nominal travel consistently | Can reduce scratchiness, spring ping, and harsh housing noise. | Smoother feel and a more refined sound profile. | Users seeking a quieter or smoother switch and enthusiasts comfortable with maintenance. | Too much or incorrectly placed lubricant can reduce tactile feedback or interfere with electrical contacts. |
| Factory Pre-Lubed | The switch is lubricated during manufacturing before it is sold. | Depends on the switch design | Depends on the switch design | Often smoother and less noisy than an unlubricated equivalent, but consistency can vary. | Saves time and reduces the need for immediate modification. | First-time builders and users who want a ready-to-install switch. | Pre-lubing quality is not uniform; inspect for uneven lubrication, excess lubricant, or dry contact areas. |
| Switch Lifespan | The number of key presses the switch is designed to withstand under specified test conditions. | Not applicable | Not applicable | Sound may change over time because of wear, keycap contact, and keyboard construction. | Provides an estimate of long-term mechanical durability. | High-use keyboards, professional typing, and long-term custom builds. | Common published ratings range from approximately 50 million to over 100 million presses, but test methods and real-world conditions vary. |
| PCB Compatibility | The keyboard PCB must match the switch pins, socket design, electrical contact layout, and physical clearance. | Not applicable | Not applicable | Compatibility does not determine sound. | Prevents installation problems, intermittent inputs, and damaged sockets. | Every hot-swappable keyboard build. | Check 3-pin or 5-pin support, standard or low-profile format, socket type, LED clearance, and whether the PCB supports the intended switch orientation. |
| Plate Compatibility | The plate holds switches in position and affects alignment, rigidity, and the overall typing feel. | Not applicable | Not applicable | Rigid plates may emphasize bottom-out sound; flexible plates may produce a softer acoustic response. | Influences stability, sound, and perceived key comfort. | Users tuning the feel and sound of a custom keyboard. | Confirm that the plate supports the chosen switch housing and layout, especially for unusual keys or plate-mounted designs. |
| LED and Backlight Clearance | The switch housing may need enough internal space for surface-mounted or through-hole lighting components. | Not applicable | Not applicable | Lighting compatibility does not directly affect sound. | Maintains backlight visibility and prevents interference during installation. | Keyboards with RGB or single-color backlighting. | Check top- or bottom-facing LED placement, switch housing clearance, and keycap compatibility before purchase. |
| Best Overall Selection Method | Match the switch's feel, force, sound, travel, and physical compatibility to the intended keyboard and environment. | Start with a comfortable range, commonly 45–60 gf for balanced use | Full-travel options commonly measure about 3.5–4.0 mm | Choose linear for lower feedback noise, tactile for moderate feedback, or clicky for prominent sound. | Balances comfort, performance, acoustics, and installation reliability. | Any user choosing switches for a hot-swappable mechanical keyboard. | Prioritize PCB and socket compatibility first, then choose feel, force, sound, travel, and price. |